
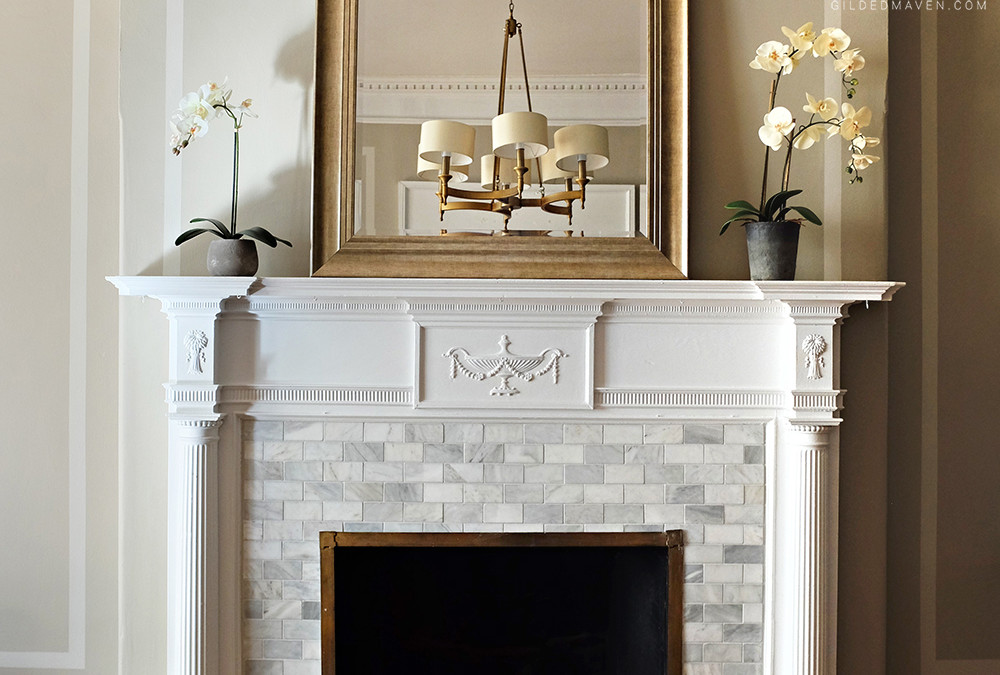
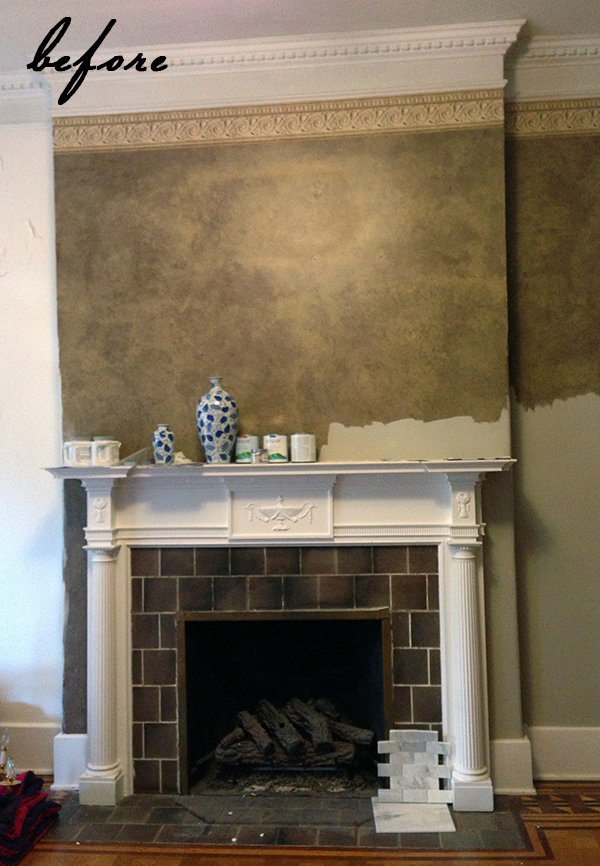
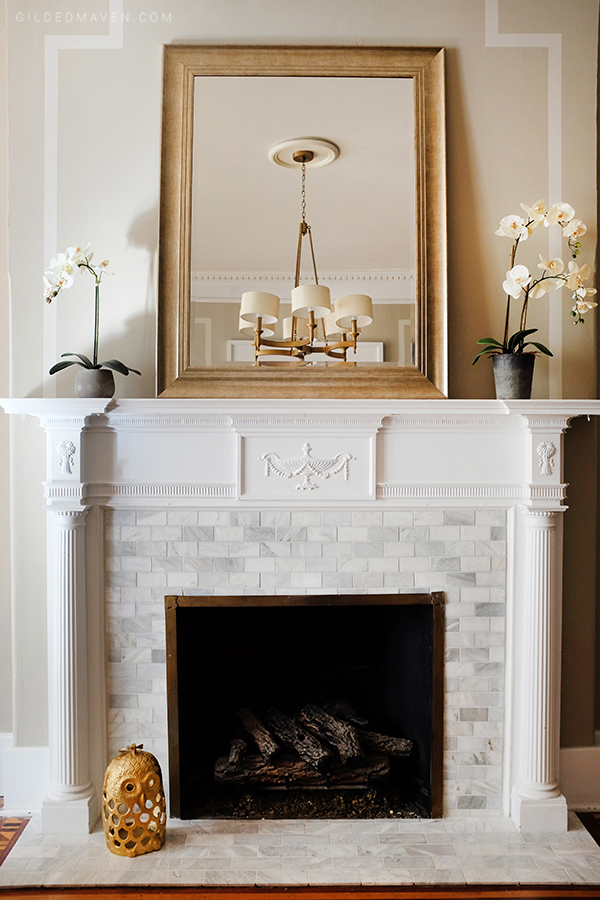
When we bought our home (which was built in the late 1800’s) we knew it was going to need a LOT of love, and potentially some blood, sweat and tears. All were given over the course of the past year. One of the last things to be complete was the fireplace. While I wanted to preserve most of the character of the house during the process, the original tile was less than, um, ‘attractive’ and was taking away from the gorgeous mantle. It deserved the marble that is was originally denied.
With most of the budget being absorbed in other unavoidable problems, there wasn’t going to be much left to fix the eyesore that was the focal point of our lovely living room. Luckily, while aimlessly perusing the aisles at Lowe’s looking for who knows what, I saw a mosaic Carrera marble subway tile for $9 a sq. ft. It was positively lovely. $100 later I had all the marble I needed. Because the original tile was set back a centimeter I decided to tile over the old ceramic. That also saved money. In the end, our fireplace facelift cost only $150. I’ll drink to that.
*Here is a fab tutorial on how to tile over tile or brick HERE!*
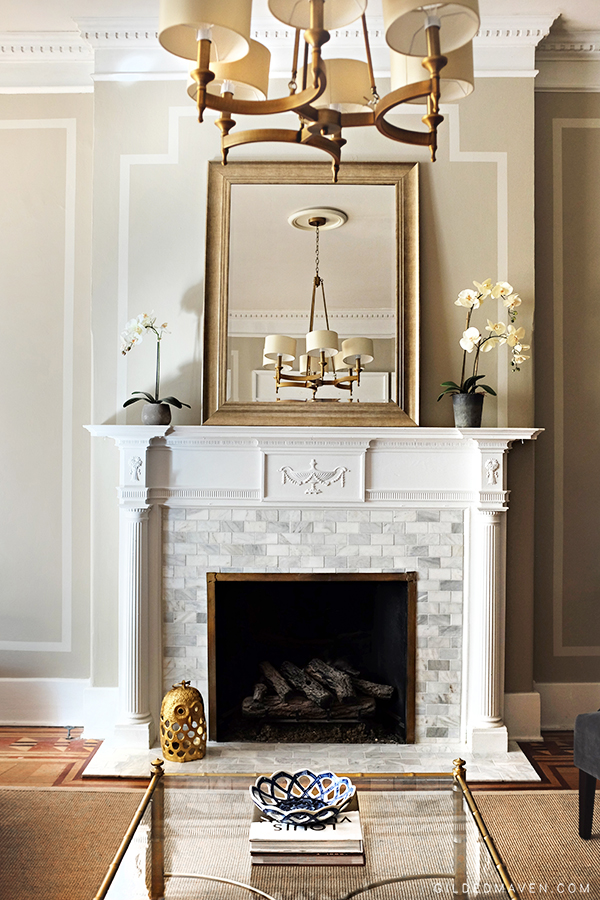
Now our next goal is to get the fireplace functioning before winter hits! The odds are against me but a girl can dream. Soon I will show you how I accomplished the paneled look on the walls and other fun tips!
Let me know what you think!
xoxo


Fabulous Job! I love seeing your home and decor ideas as we are redoing our 1970’s ranch! Where did you get the rug? I NEED it!
Thank you so much Misty! I actually just searched for Sisal rugs on eBay and chose one from their enormous & affordable selection!